The first time I tried knitting German short rows, I felt like I was doing something wrong. The turning stitch at the end of every row looked like a hot mess. But I pressed on and ended up with a lovely sock heel. I'm glad I didn't give up.
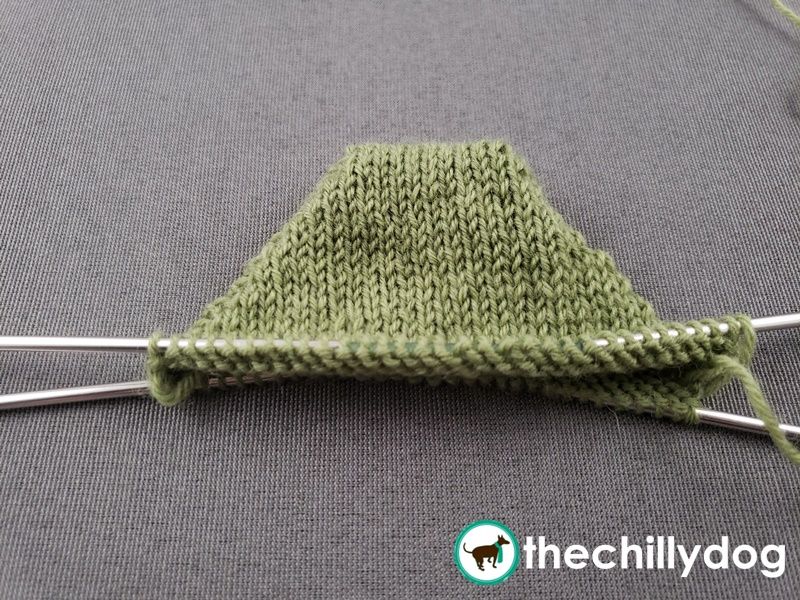
Thanks to Skacel for providing the addi FlipStix needles and the Zitron Trekking Sport yarn used in this tutorial. These products are available locally at many yarn shops and online at Makers' Mercantile.
(If needed, you can review the lesson on the Provision Crochet Cast On mentioned in the video.)
Before You Begin
German short rows are most commonly used in sock knitting. The tecnique can be used to create the rounded cup shape of the heel or toe.
The basic idea is that instead of knitting across a full row of stitches, you only knit across part of the row before you turn your work, hence the name short rows. You also need to create a special turning stitch at the end of every short row to avoid creating any holes in your work later.
German Short Rows
The special turning stitch at the end of each row is called a double stitch. It's made by pulling the working yarn over your needles and sort of flipping the stitch on your needles upside down.
To ensure that your shaping is symmetrical, it's important to work in pairs of rows, one RS row and one WS row.
See it in Action
(If needed, you can review the lesson on the Provision Crochet Cast On mentioned in the video.)
Recommended Pattern
If you'd like to make the 'Beekeeper Socks' shown in this tutorial, the pattern is available in my pattern shop.