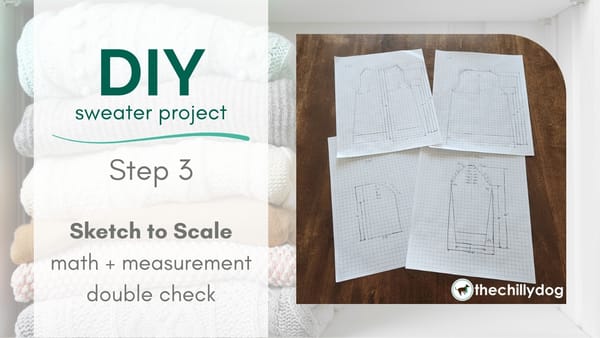
Design it Yourself Sweater Project | Step 3

– 5 min read
After making a rough draft of my sweater plan, it's time to draw each piece to scale and do a little arithmetic to make sure everything will fit together. This part takes some time to work through, but I promise, you don't have to be an artist, engineer or mathematician.
It's likely you'll need to take additional measurements of your template sweater so you'll also need:
To make things simple as I draw, 1 square on my graph paper will equal 1 inch of my sweater.
As I was sketching out my rough drafts, I didn't worry too much about measurements around the armhole openings. I can draw a nearly complete picture of the back and the fronts with just my initial horizontal and vertical measurements.
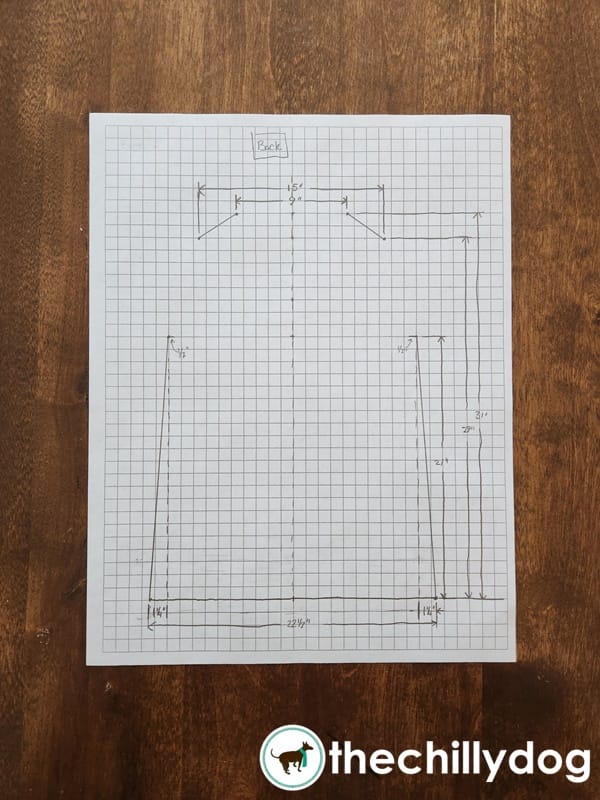
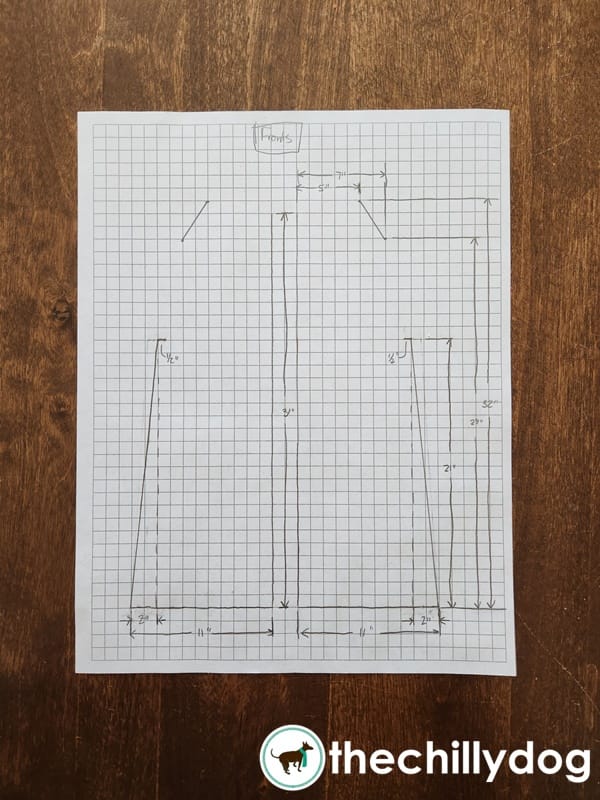
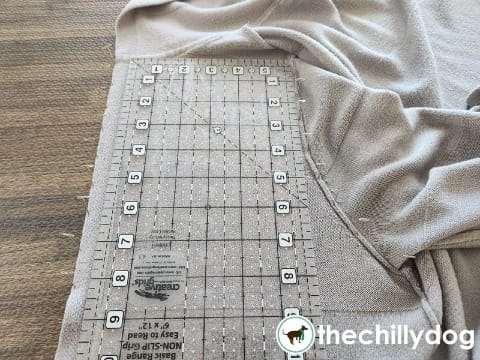
To fill in the blanks, I need to take measurements for the armhole shaping. Rather than stressing about curves, I'm going to measure the horizontal distances across each piece at vertical, 1-inch increments which I mark with t-pins. I measure to the nearest 1/4 inch.
Now I can draw in the armholes.
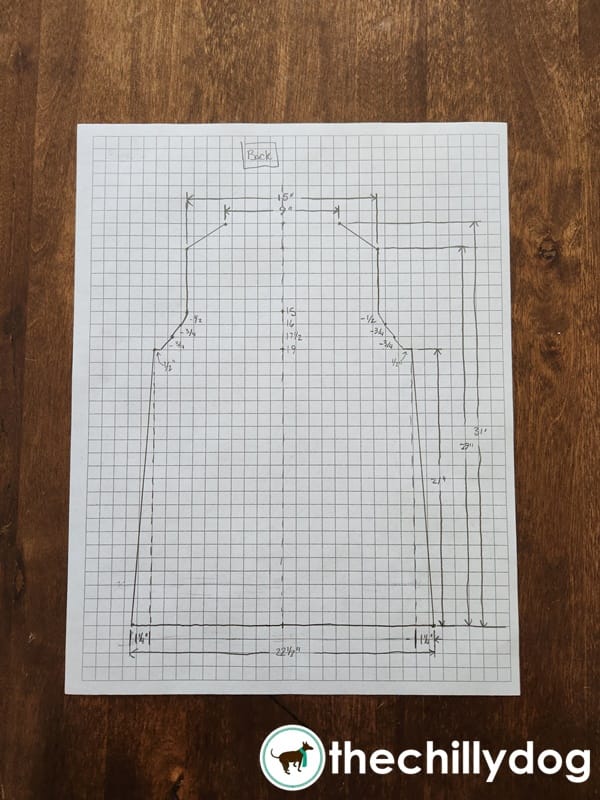
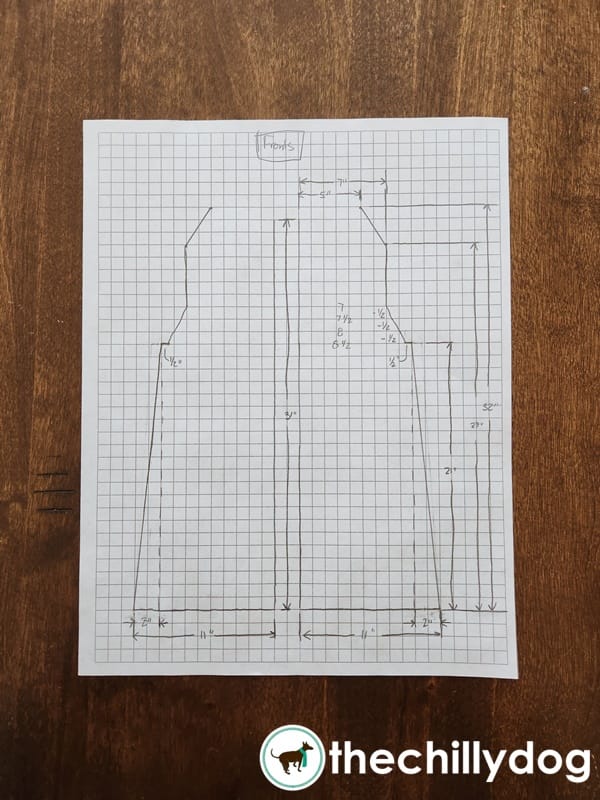
Then I sketch in what I think will work for the neckline shaping.
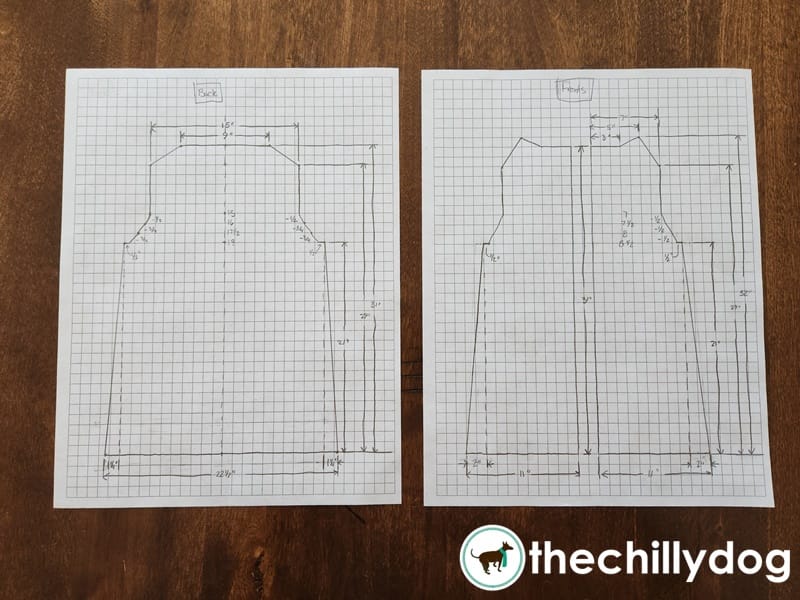
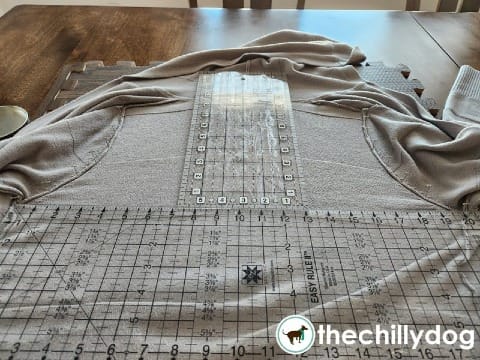
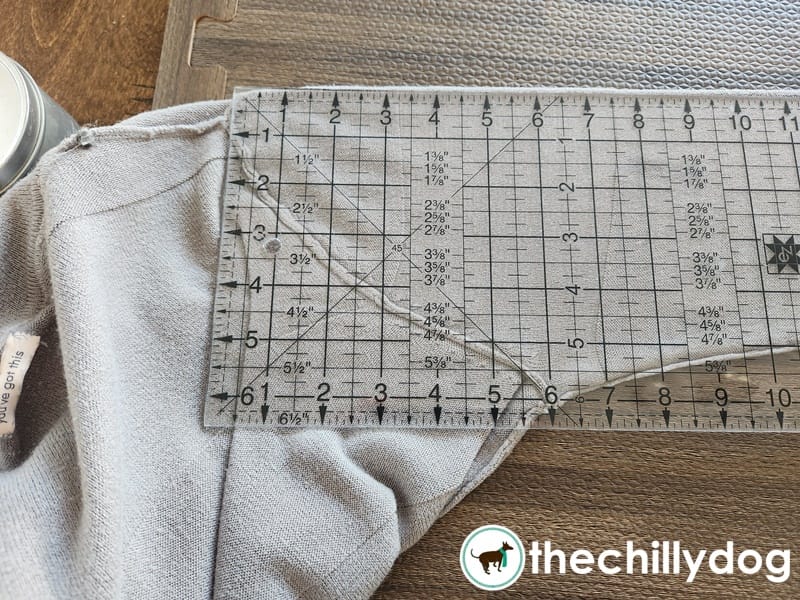
Before I draw the sleeve to scale I notice something. The front and back of the armhole is not exactly symmetrical. That means I should probably go back and re-measure the sleeve cap of my sweater template. I initially assumed that I could fold the sleeve in half and double the measurements. That may not be true.
I turn the sleeve inside out and fold it along the arm seam. A clear quilting ruler makes it easier to measure across half the sleeve cap at 1 inch increments.
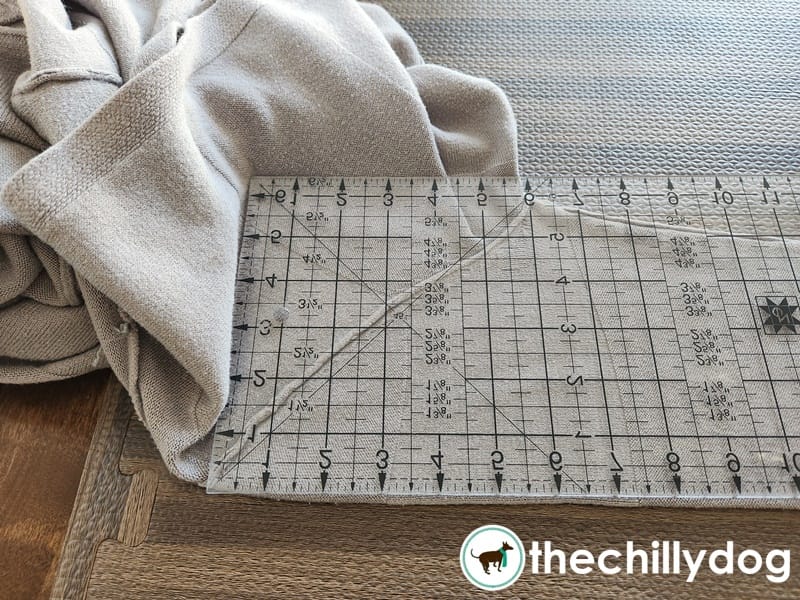
I flip the sleeve over to measure the other half of the cap and I am careful to start at the same "center" at the top of the shoulder.
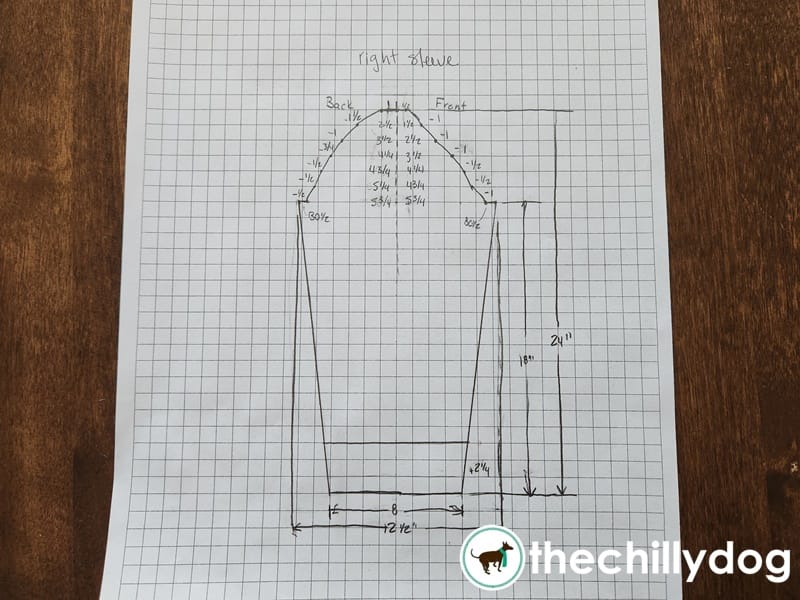
Now I can draw the sleeve to scale.
Before I draw out my hood, I'm going to make sure the fronts, back and sleeves will fit together where they will later be seamed. I'm going to use the Pythagorean theorem to break any part of my drawing that isn't completely horizontal or vertical into a right triangle. You may recognize this formula from middle school geometry.
I know the vertical and horizontal length, A and B, for every triangle. I'll use those lengths to solve for the angled lengths, C.
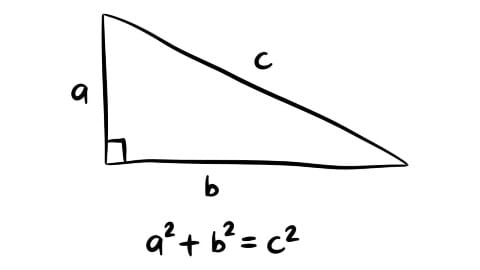
Here's an example of how to work through the Pythagorean Theorem. Let's look at the front of my sweater, zoom in on the armhole and solve for C.
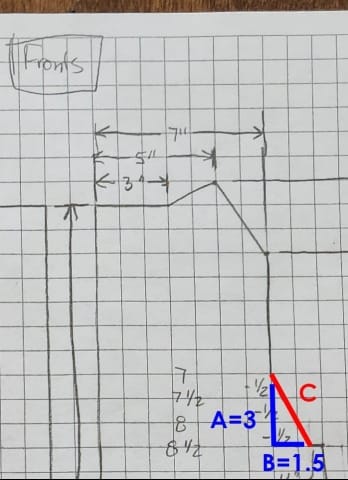
I fill my vertical and horizontal measurements into the first part of the formula:
A² + B² = (3 x 3) + (1.5 x 1.5) = 9 + 2.25 = 11.25
Now I can solve for C. The trickiest part may be finding the square root button "√" on your calculator.
C = √11.25 = 3.35 inches
Again, I use this formula to figure out the length of every line on my drawing that isn't horizontal or vertical. It's time consuming, but not overly-difficult.
Now I can use arithmetic (and my calculator) to make sure pieces that will be seamed together are the same length:
If the lengths of seamed pieces aren't close to equal, the pieces won't fit together. This is the time to fix design problems.
This is the iterative part of the process and it's really important.
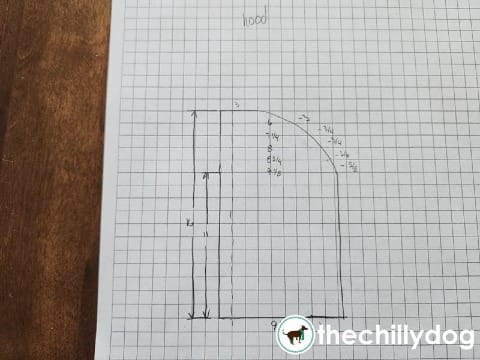
After double-checking my math and drawings to ensure all the pieces will fit together, I used the neck opening measurements from my drawings to help me figure out how big the hood will be at the neck.
So far there's been a lot of paper and pencil work. Now, I'm looking forward to swatching to test out stitch patterns and choose which yarn I will use for my sweater.
If you're designing and knitting along with me and have any troubles, triumphs or questions as you sketch to scale, just leave a note in the comments.