Design it Yourself Sweater Project | Step 7

– 5 min read
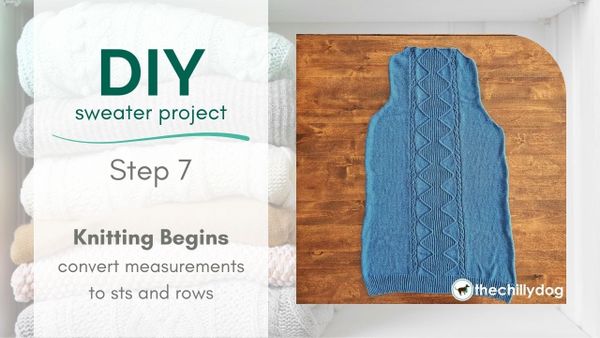
After estimating the amount of yarn I'll be using for my sweater (and making sure I actually have enough yarn) there's one last bit of math I need to do before before I start knitting. I need to convert the finished sweater measurements into stitches or rows.
Gauge before blocking usually does not equal gauge after blocking. Knit fabric almost always changes when it's washed and dried. Therefor, the size of the knit fabric on my needles will likely not be the same as the final dimensions of my project.
As I discovered when I blocked my swatches, my gauge changed after my fabric was washed and dried. It was especially noticeable in the row gauge. Before blocking my row gauge was 39 rows/4 inches. After blocking it was 44 rows/4 inches. So let's look at what would happen if relied on taking measurements as I knit rather than converting my finished measurements to sts/rows.
Example
I want the sleeve of my sweater to be 24 inches long. If I blindly knit until the sleeve measures 24 inches on my needles, my sleeve will be 234 rows long. So far, so good.
But what happens after I wash and dry that sleeve the first time? The fabric shrinks a little in length. Based on my finished gauge of 44 rows/4 inches, my sleeve is now:
(234 rows) x 4 inches/44 rows = 21.25 inches
That's nearly 3 inches shorter than I need!
Since I don't want my sleeves to be 3 inches too short, I'll convert all of my desired finished dimensions to sts and rows before I start knitting.
Now, here's the magic formula! (Make sure to use your finished gauge without rounding):
Number of Rows = finished length x row gauge/4 inches or 10 cm
Number of Stitches = finished width x stitch gauge/4 inches or 10 cm
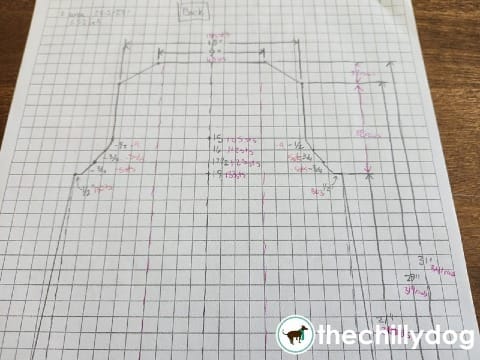
I'm knitting a pieced sweater, and it doesn't particularly matter which piece I knit first. I decided to get the big piece out of the way and start with the back. My last little bit of math is related to how my stitch pattern will fit into the overall design.
I know:
What I don't know is how long I should make the ribbing, but I can figure out a couple options.
I choose the second option and it's finally time to start knitting!
Cast on. Knit the ribbing. Start knitting the pattern. Realize that the ribbing draws in way to much compared to the rest of the back. Rip everything out.
Go up a needle size for the ribbing. Cast on. Knit the ribbing. Change back to the original needle size. Knit the back.
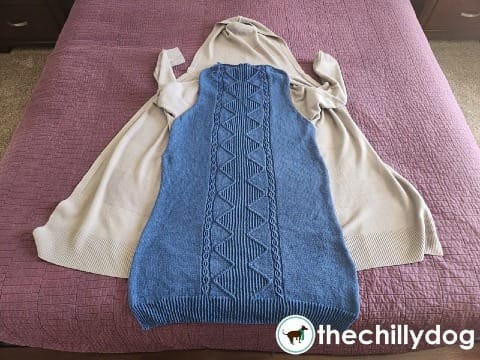
Remember that the fabric changes after washing and drying. Wash and dry the back.
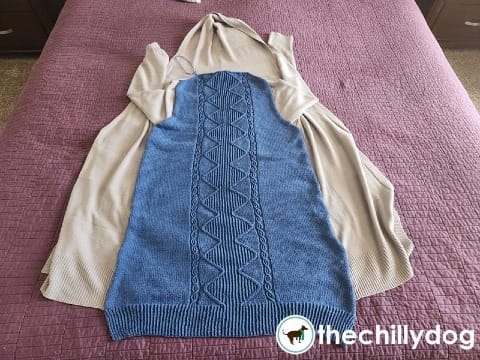
The finished sweater back ended up being about 2 inches longer than I expected. For a split second I thought about ripping it all out and re-knitting it, but ultimately decided it would be a better use of my time to just figure out why it happened. There were two issues I overlooked.
When I worked the ribbing, I went up a needle size to accommodate the width of the sweater, but didn't adjust how many rows I worked. The ribbing that should have been 2 inches (on smaller needles) is actually 2.5 inches.
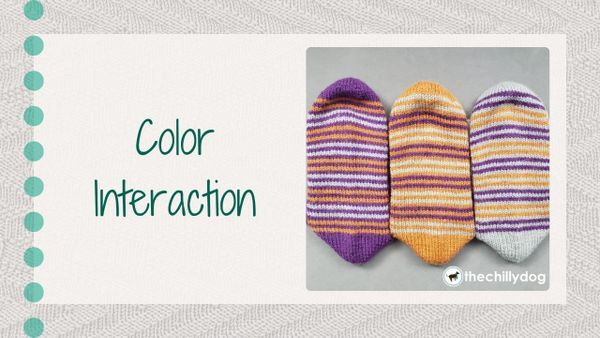
I'm a little embarrassed to admit what caused the additional 1.5 inches in length because I should have known better. My dyer friends have told me about this phenomenon, but I never really gave it much thought until now.
Did I knit my swatch and sweater with the same color of yarn? Well, no. And guess what, my sweater gauge is slightly different than my swatch gauge.
To add insult to injury, even without swatching in my chosen color. I could have figured this out before I finished knitting the back. At some point, I should have compared the before-blocking gauge of my sweater to the before-blocking gauge of my swatch. Oops.
I'm going to relax and accept that the body of my sweater is going to be slightly longer than I planned. This is not the end of the world and in my opinion too long is better than too short.
Now I'm settling into the knitting portion of my sweater, but I'll keep you posted about the progress and any other interesting lessons learned (like my philosophy on fixing mistakes).
Yarn and needle support provided by