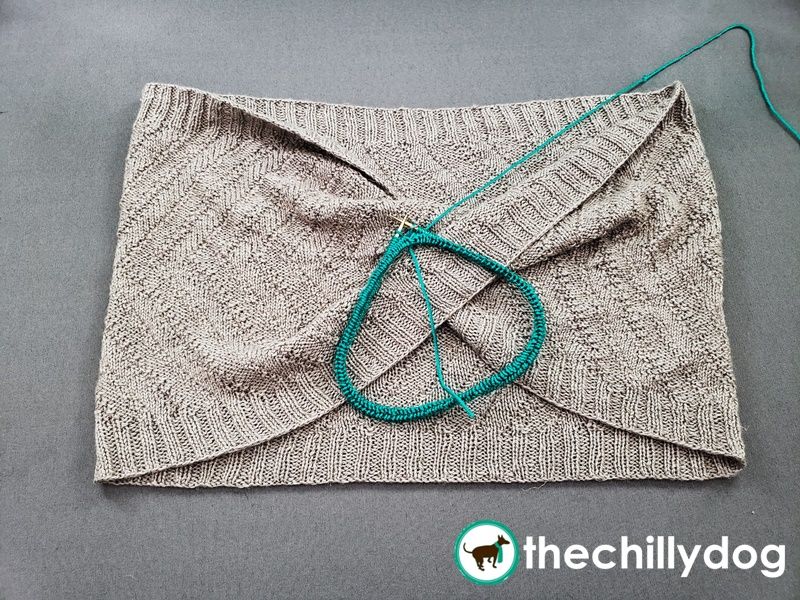
The result is a tubular shape that's rather mysterious to knitters. A Möbius has only one side, the right side, and only one edge, the bound off edge. Think of it as a three dimensional figure eight.
Before You Begin
Materials
Thanks to Skacel for providing the Rylie by HiKoo yarn used in this pattern as well as the addi Turbo Lace circular needles. These products are available locally at many yarn shops and online at Makers' Mercantile.Other Tools and Notions
- ring stitch marker
Möbius Cast On
See it in Action
Position The Needles
(1) Position your needles like a spring.
(2) The needle in your right hand is at the top or the spring with the tip pointing to the left. The needle in your left hand is at the bottom of the spring pointing to the right.
(3) Pinch the cord with your right hand. Let go of the left needle and let it drop or tuck it under your right arm. It is very important that the left needle does not go through the center coil of the spring throughout the cast on process.
Attach the Yarn
(1) Place a slip knot onto your right needle. Your slip knot should tighten around the needle when the working yarn is pulled.
(2) Slide the slip knot down the needle and around the cord until it reaches the right needle tip. Pinch the slip knot and tension the working yarn in your left hand. This is the “home” position.Cast On Stitches
(1) Bring the right needle tip forward.
(2) Bring the right needle tip under the cord.(3) Bring the right needle tip over the working yarn.
(4) Pull the working yarn forward under the cord.
(5) Continue moving the right needle towards the home position then over, behind and under the working yarn.
(6) Notice how the stitches on the needle slant the same direction.
Repeat until the desired number of stitches have been cast on. Only count the stitches that are cast on to the right needle. Do not count the slip knot and stitches that are held on the cord beneath the needle.
Working Rnd 1
(2) Be careful that the stitches do not leap-frog over one another as they are pushed up the left needle. The yarn tail can hang between the needles and cord to the back. Place a stitch marker on the right needle tip. Begin the round by working a stitch into the slip knot.
(3) Each cast on stitch makes a “^”. Notice that the stitches are mounted alternately. The leading leg of the first “^” is behind the left needle. The leading leg of the next “^” is in front of the left needle. Simply knit or purl around the leading leg of each stitch by bringing the right needle through the center of each “^”.
(4) When you have worked into the last “^”, the stitch marker is hanging on the cord below and the yarn tail is at the front, half of the first round is complete and things get much easier. From this point, all of the stitches are mounted as you would expect. Continue working Rnd 1 of the stitch pattern.
(5) When the stitch marker reaches the left needle tip, the round is complete.
(6) Slip the stitch marker from the left needle to the right and continue working in the round.
The first round essentially doubles the number of stitches cast on because you have worked into both the top and bottom of the cast on stitches.
Recommended Pattern
Ready to try this technique in a pattern? The Ohmö Shawl Pattern shown in this lesson has video tutorials to help you learn and practice these skills: