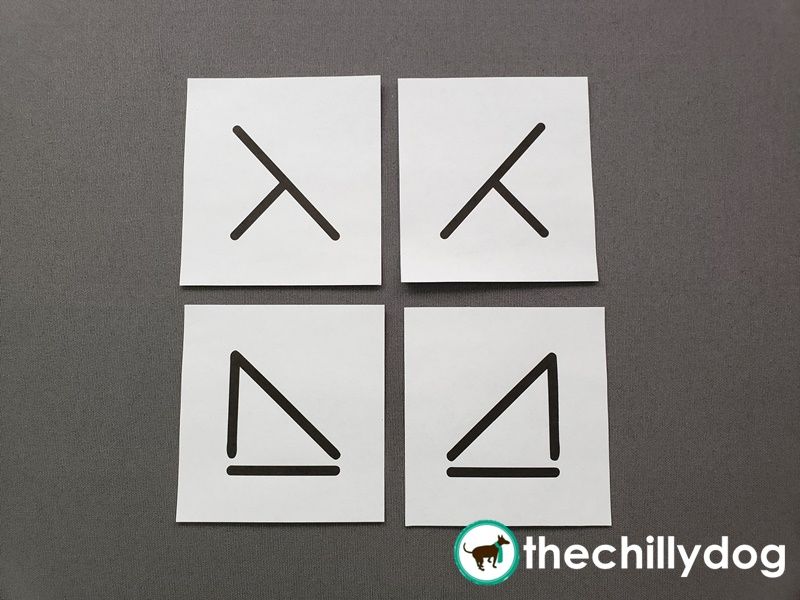
Decreasing stitches can be frustrating to new knitters. Not because decreases are difficult to execute, but because it can be hard to remember which direction a decrease slants. If you are working from a stitch chart, it can also be tricky to remember which decrease to use for which symbol without constantly referring back to the key.
Before You Begin
Let's start with three quick tips to help you with decrease slants and stitch charts.
1. When you are working 2 stitches together, the decrease will slant in the same direction that your right (working) needle enters the pair.
2. Chart symbols visually represent the direction of the slant on the right side of your work. If the chart symbol slants up and to the right /, your decrease will slant to the right. If the chart symbol slants up and to the left \, your decrease will slant to the left.
3. When you are working on a wrong side row, your decreased stitches will slant in the opposite direction as the charted symbol.
Materials
Thanks to Skacel for providing the CoBaSi by HiKoo yarn and addi Natura Olivewood Circular Needles used in this tutorial. These products are available locally at many yarn shops and online at Makers' Mercantile.Decrease Slants and Stitch Charts
Recommended Pattern
Ready to try this technique in a pattern? The Wallflower Sweater Pattern shown in this lesson has videos to help you learn more about:
- The Importance of Swatching
- Tracking Progress in Complex Knitting Patterns
- Open Bar Increase (a.k.a. Open Make 1 Increase)
- Decrease Slant and Stitch Charts - 3 Helpful Tips
- Smocked, or Tied, Stitches
- Dividing the Body and Casting On Underarm Stitches for Top Down Sweaters
- Picking Up Underarm Stitches for a Gap Free Sleeve
- Suspended Bind Off (Purlwise)