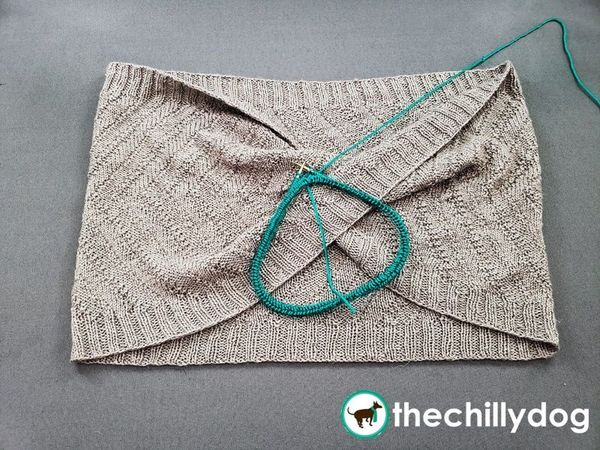
If you have never knit a Möbius cast on, prepare to have your mind blown. The cast on itself is similar to a provisional cast on worked around a piece of waste yarn. However, both the cast on and held stitches are worked in the very first round of knitting instead of waiting until later.
The result is a tubular shape that's rather mysterious to knitters. A Möbius has only one side, the right side, and only one edge, the bound off edge. Think of it as a three dimensional figure eight.
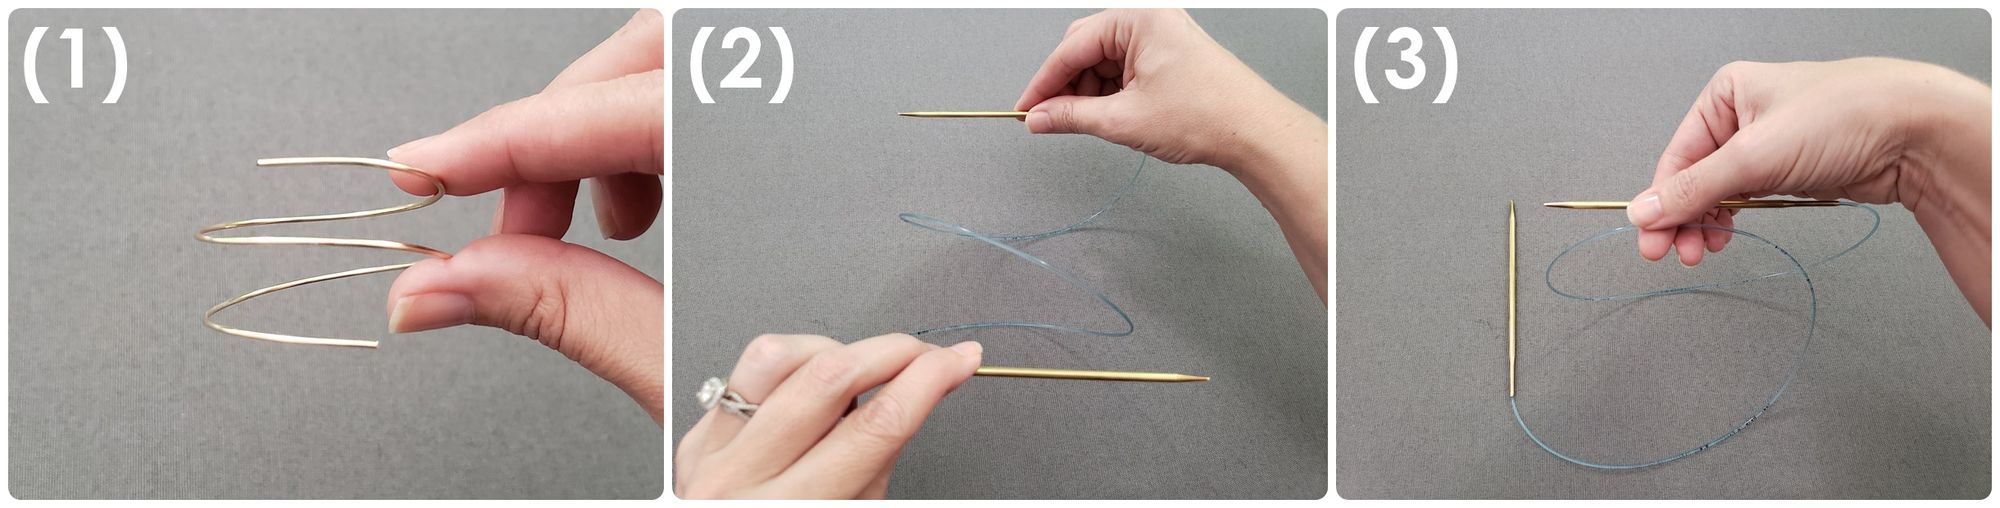
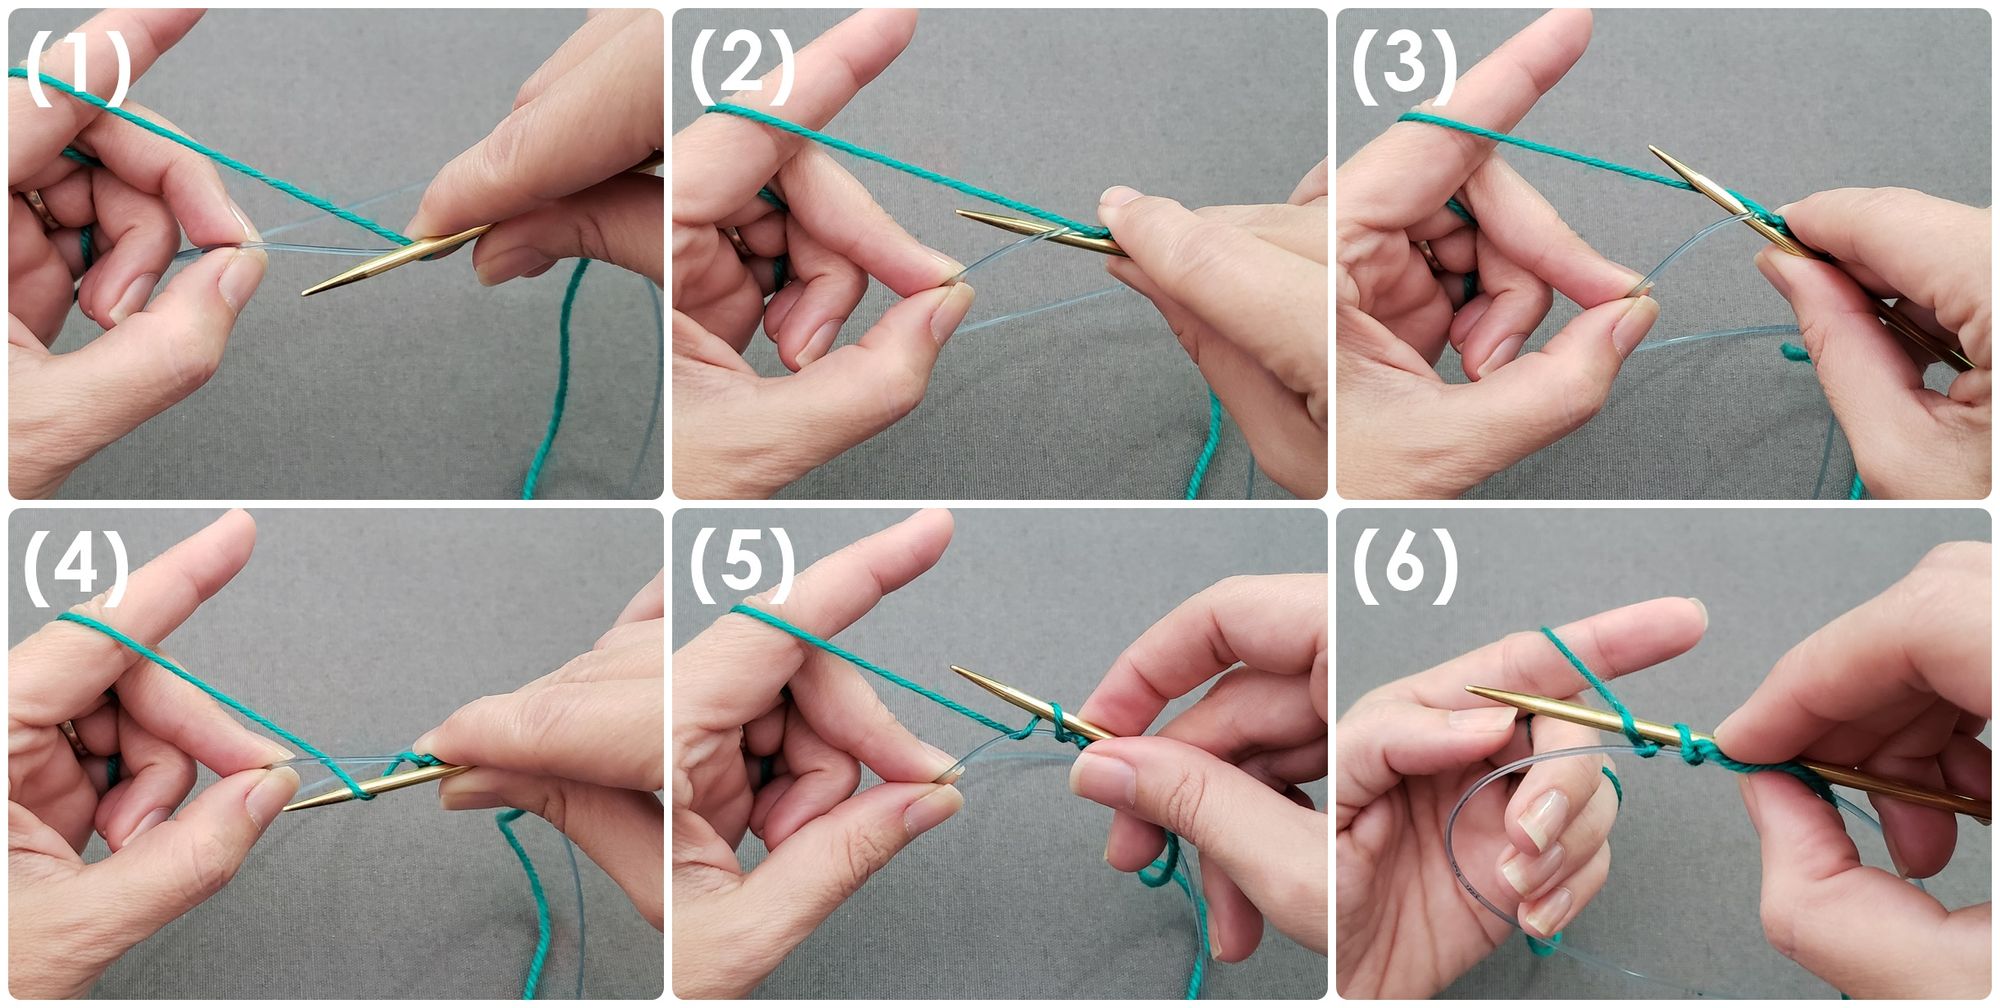
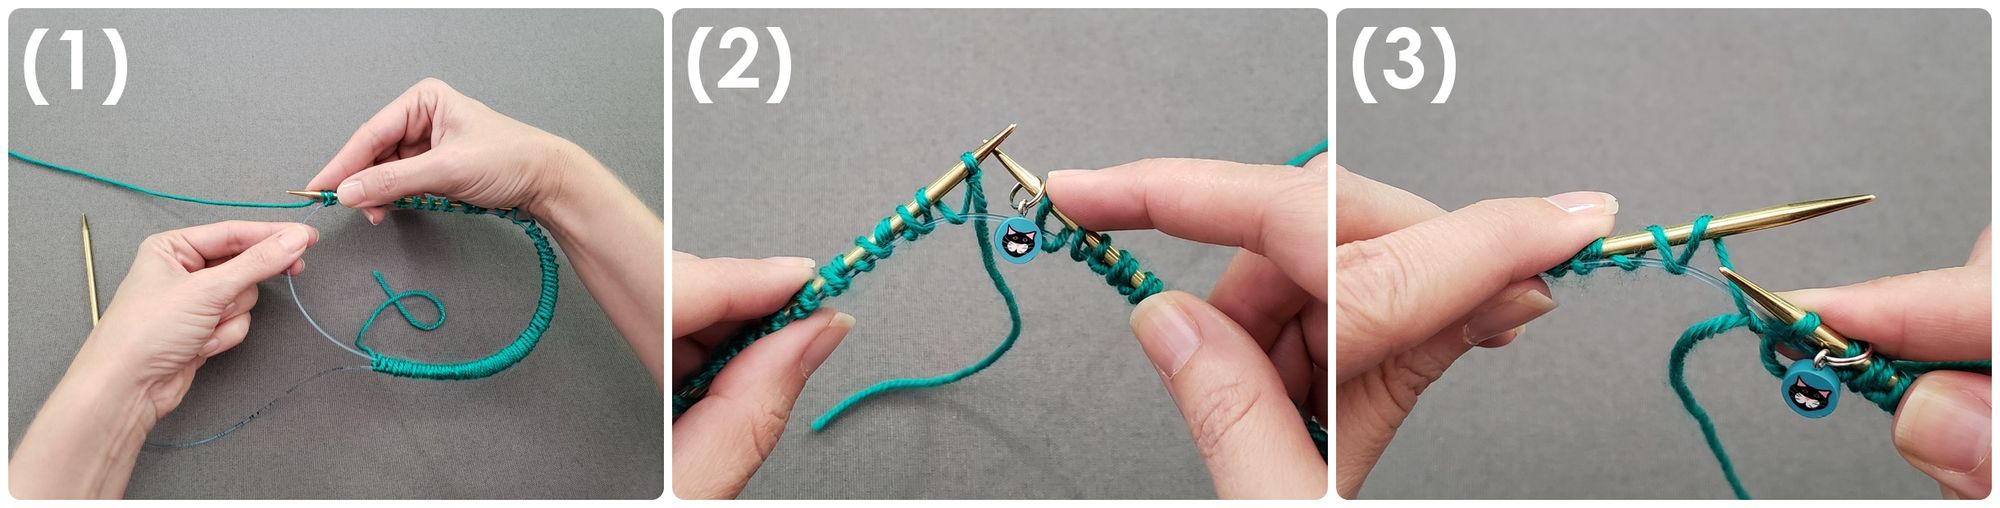
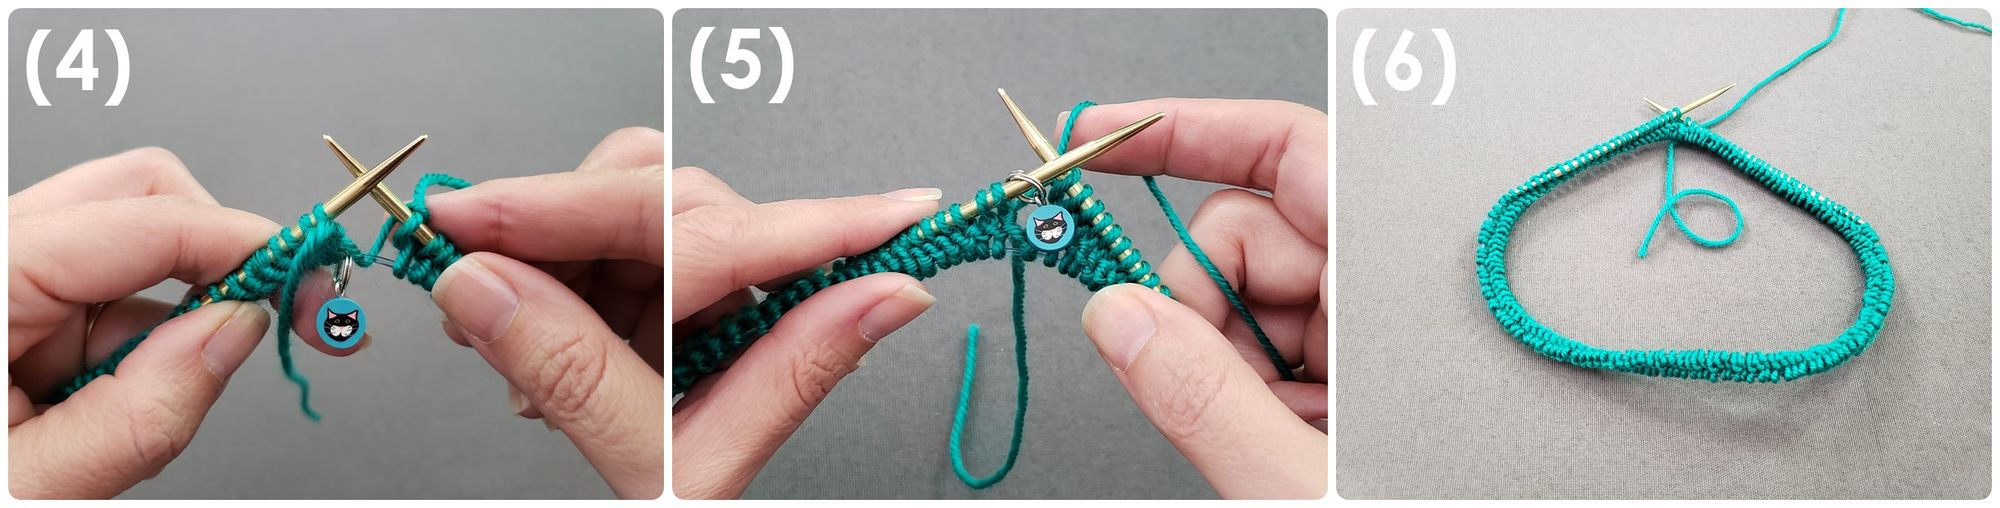
(1) Position your needles like a spring. (2) The needle in your right hand is at the top or the spring with the tip pointing to the left. The needle in your left hand is at the bottom of the spring pointing to the right. (3) Pinch the cord with your right hand. Let go of the left needle and let it drop or tuck it under your right arm. It is very important that the left needle does not go through the center coil of the spring throughout the cast on process.(1) Place a slip knot onto your right needle. Your slip knot should tighten around the needle when the working yarn is pulled. (2) Slide the slip knot down the needle and around the cord until it reaches the right needle tip. Pinch the slip knot and tension the working yarn in your left hand. This is the “home” position.(1) Bring the right needle tip forward. (2) Bring the right needle tip under the cord. (3) Bring the right needle tip over the working yarn. (4) Pull the working yarn forward under the cord. (5) Continue moving the right needle towards the home position then over, behind and under the working yarn. (6) Notice how the stitches on the needle slant the same direction. Repeat 1-6 until the desired number of stitches have been cast on. Only count the stitches that are cast on to the right needle. Do not count the slip knot and stitches that are held on the cord beneath the needle.(1) After all the stitches have been cast on, give the cord a slight pull near the right needle tip so stitches can be slid onto the left needle. Slide stitches around the cord onto the left needle. Remember, do not let the left needle pass through the center of the cast on coil. (2) Be careful that the stitches do not leap-frog over one another as they are pushed up the left needle. The yarn tail can hang between the needles and cord to the back. Place a stitch marker on the right needle tip. Begin the round by working a stitch into the slip knot. (3) Each cast on stitch makes a “^”. Notice that the stitches are mounted alternately. The leading leg of the first “^” is behind the left needle. The leading leg of the next “^” is in front of the left needle. Simply knit or purl around the leading leg of each stitch by bringing the right needle through the center of each “^”.(4) When you have worked into the last “^”, the stitch marker is hanging on the cord below and the yarn tail is at the front, half of the first round is complete and things get much easier. From this point, all of the stitches are mounted as you would expect. Continue working Rnd 1 of the stitch pattern. (5) When the stitch marker reaches the left needle tip, the round is complete. (6) Slip the stitch marker from the left needle to the right and continue working in the round. The first round essentially doubles the number of stitches cast on because you have worked into both the top and bottom of the cast on stitches.
Yarn and needle support provided by
Family owned and operated since 1987, at skacel we strive to provide top-notch customer service, world-class products, and cutting-edge designs.