Closed Yarn Overs | Photo Tutorial
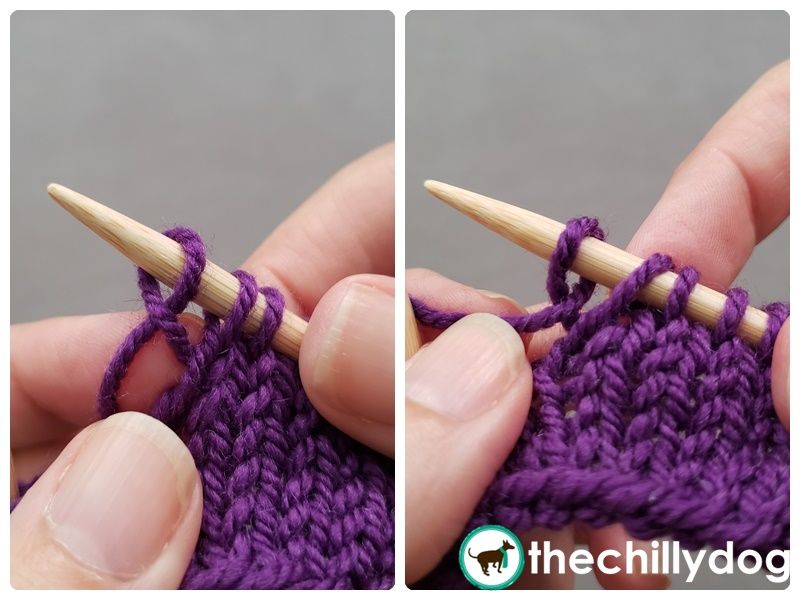
A closed yarn over increase can be performed in a variety of ways. Structurally, if you follow the path of the working yarn, a closed yarn over increase is similar to make 1 increase. However, instead of working into the horizontal strand of yarn that naturally exists between two stitches, a new stitch is added by creating a loop around your working needle.
Knit Inc Sampler Squares Lesson 5
Pattern: Knit Inc Sampler Squares
Yarn: Ewe Ewe Yarns Wooly Worsted shown in color 83 Iris Blossom
Needles: skacel by addi Natura Bamboo US size 8 (5 mm) DPNs
Closed Yarn Over
When making a closed yarn over increase, the increased stitch is twisted so that the left leg of the stitch crosses over the right or the right leg of the stitch crosses over the left.
This type of increase can be executed in a variety of ways.
Tip : When the left leg of a closed yarn over increase crosses over the right, it is comparable to a M1L. When the right leg of a closed yarn over increase crosses over the right, it is comparable to a M1R.
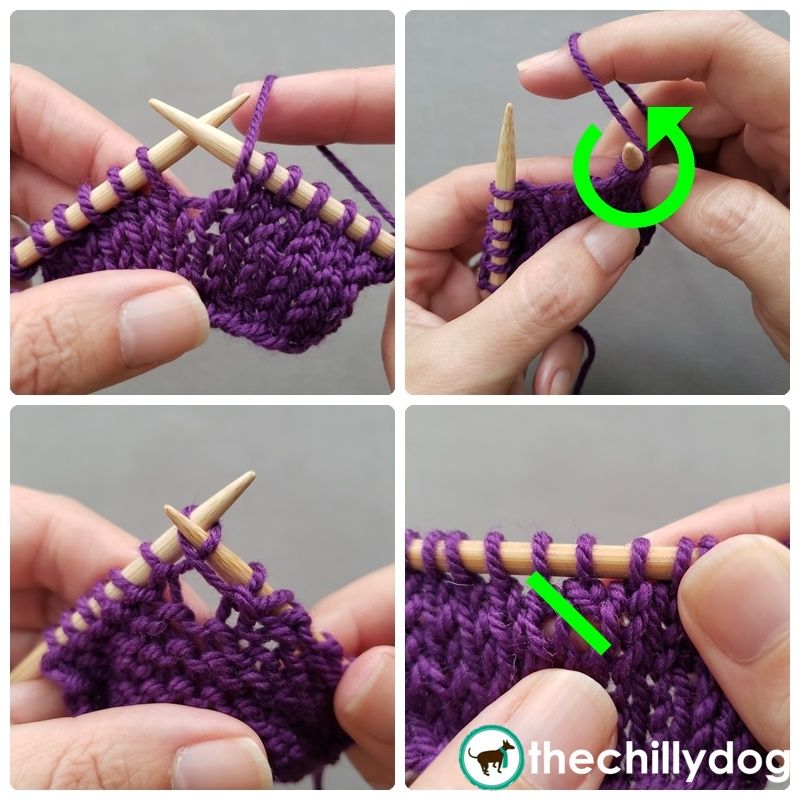
Option 1 - Bring the yarn forward then over the working needle. The yarn is wrapped counter-clockwise around the working needle, but remains unanchored until the next stitch is formed. In the next row or round, work the yarn over through the back loop (tbl). The yarn over is twisted with the left leg of the stitch over the right.
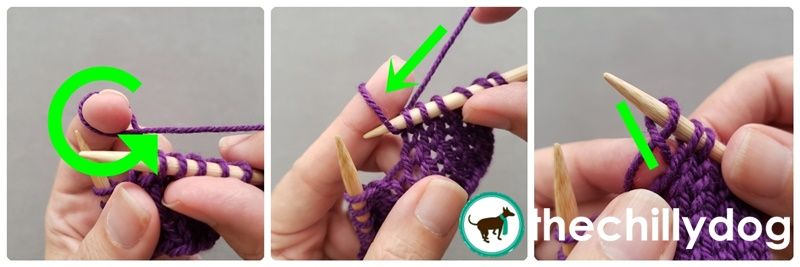
Option 2 - Loop the working yarn around the left index finger counter-clockwise, from back to front. Insert the working needle down through the finger loop. Slip the finger out of the loop, tighten the working yarn and notice the left leg of the new stitch crosses over the right.
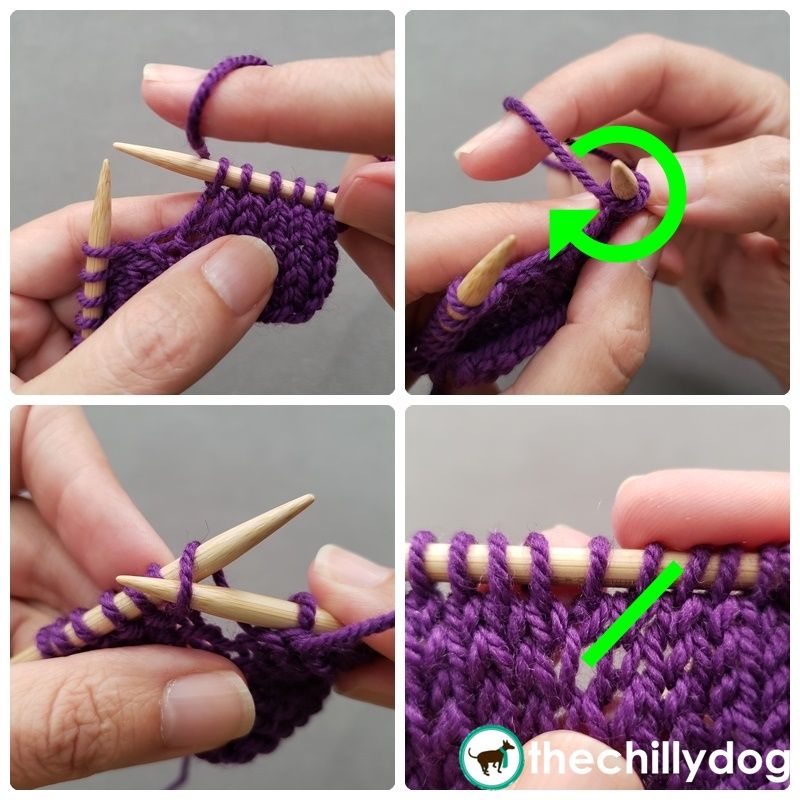
Option 3 - Bring the yarn backward then over the working needle. The yarn is wrapped clockwise around the working needle, but remains unanchored until the next stitch is formed. In the next row or round, work the rev YO through the front loop. The reverse yarn over is twisted with the right leg of the stitch over the left.
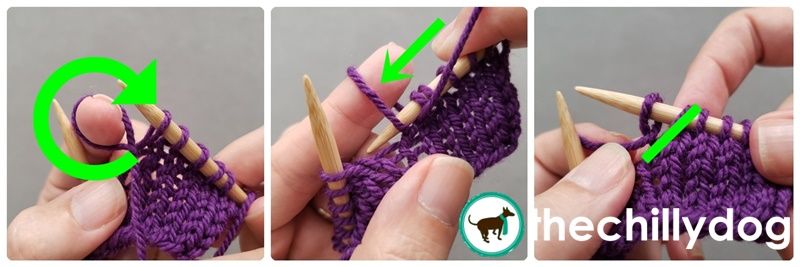
Option 4 - Loop the working yarn around the left index finger clockwise, from front to back. Insert the working needle down through the finger loop. Slip the finger out of the loop, tighten the working yarn and notice the right leg of the new stitch crosses over the left.
Block 9
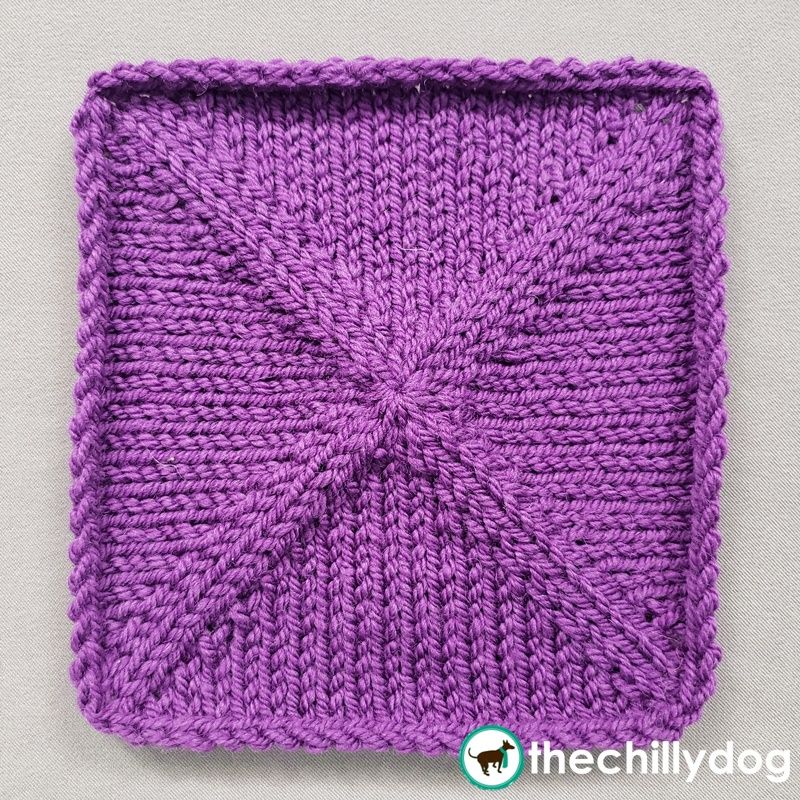
CO 12 using a Pinhole CO.
Rnd 1 and all odd Rnds: k all sts.
Rnd 2: [k1, INC, k1, INC, k1] 4 times.
Rnd 4: [k1, INC, k3, INC, k1] 4 times.
Rnd 6: [k1, INC, k5, INC, k1] 4 times.
Rnd 8: [k1, INC, k7, INC, k1] 4 times.
Rnd 10: [k1, INC, k9, INC, k1] 4 times.
Rnd 12: [k1, INC, k11, INC, k1] 4 times.
Rnd 14: [k1, INC, k13, INC, k1] 4 times.
Rnd 16: [k1, INC, k15, INC, k1] 4 times.
Rnd 18: [k1, INC, k17, INC, k1] 4 times.
BO.
Block 10
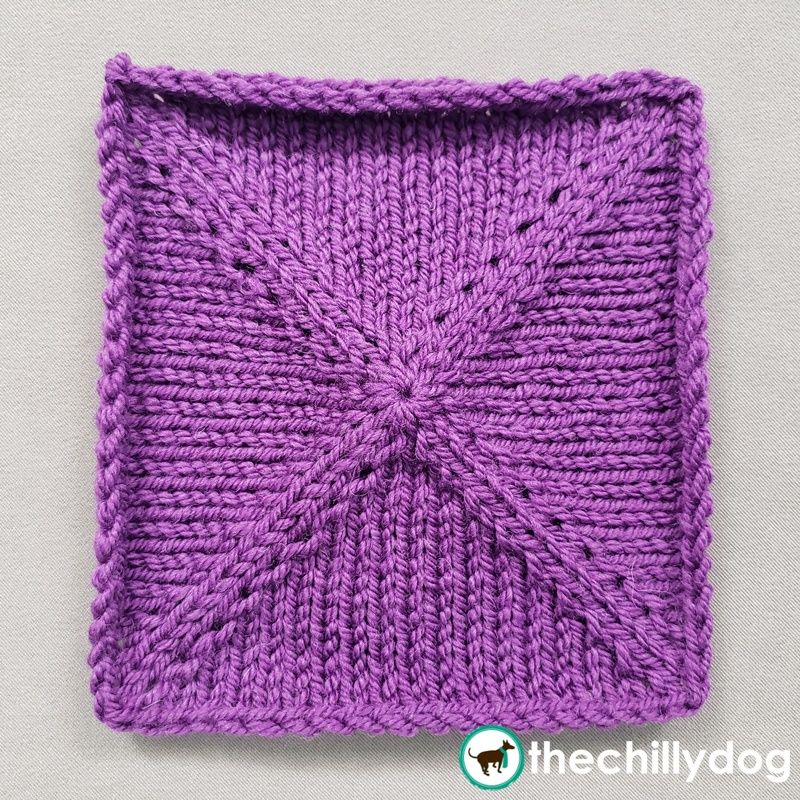
CO 12 using a Pinhole CO.
Rnd 1 and all odd Rnds: k all sts.
Rnd 2: [k1, INC, k1, INC, k1] 4 times.
Rnd 4: [k1, INC, k3, INC, k1] 4 times.
Rnd 6: [k1, INC, k5, INC, k1] 4 times.
Rnd 8: [k1, INC, k7, INC, k1] 4 times.
Rnd 10: [k1, INC, k9, INC, k1] 4 times.
Rnd 12: [k1, INC, k11, INC, k1] 4 times.
Rnd 14: [k1, INC, k13, INC, k1] 4 times.
Rnd 16: [k1, INC, k15, INC, k1] 4 times.
Rnd 18: [k1, INC, k17, INC, k1] 4 times.
BO.


There's more to explore in the Learning Library!
